Gaming hardware maintenance starts as soon as a console leaves its box. Regular care reduces overheating, cuts repair bills, and keeps frame rates steady during long sessions. This guide gives direct, practical steps gamers can follow now: where to place a console, how to remove dust safely, software checks to run, and simple troubleshooting that solves the most common faults. It uses official manufacturer practices and real-world lessons to help players extend the life of PlayStation, Xbox, and Nintendo systems without voiding warranties.
Table of Contents
ToggleKey Takeaways
- Regular gaming hardware maintenance prevents overheating and extends console lifespan by ensuring steady performance.
- Keep console vents clear with weekly dust removal and maintain at least 4–6 inches of airflow space around devices.
- Use safe cleaning methods: power down consoles before wiping with microfiber cloths and use compressed air cautiously for vents every few months.
- Optimize performance by updating firmware promptly and performing basic troubleshooting like rebooting and clearing cache when lag occurs.
- Protect consoles with quality surge protectors to prevent power-related hardware failures.
- Consistent care, including cleaning, proper placement, and software upkeep, reduces repair costs and enhances gaming experience.
Why Regular Console Maintenance Pays Off
Regular console maintenance prevents two predictable outcomes: heat-related failures and premature service costs. In a closed living room environment, dust builds up on vents and traps heat. That raised temperature increases fan speed, raises noise, and shortens component life. One practical example: a console that runs 8°C cooler after a quarter-year cleaning commonly reports fewer spontaneous shutdowns and quieter fans.
Maintenance also preserves user experience. When thermal paste dries or vents clog, GPUs and CPUs throttle performance. Players notice lower frame rates or longer load times first: technicians see hardware errors later. Routine care reduces repair visits and the chance of warranty exceptions for negligence.
Practical return on effort: a five-minute weekly wipe and a 20-minute vent cleaning every three months can postpone an out-of-warranty repair that would cost hundreds of dollars. For deeper repair walkthroughs and post-failure guidance, hobbyists rely on in-depth resources such as the comprehensive console repair overview available on the site’s pillar article about console troubleshooting. This ties everyday maintenance to repair options when problems exceed home fixes.
Routine Cleaning And Dust Management For Consoles
Clear answer: keep vents accessible and remove visible dust weekly. A console needs at least 4–6 inches of clearance on vented sides to draw cool air. Gamers who stack game cases against a console or tuck it into a closed cabinet increase intake temperature by several degrees within hours.
Place consoles on hard, level surfaces rather than carpet. Carpet fibers and pet hair accelerate clogging. For living rooms with pets, move the system to a raised shelf and vacuum nearby floors weekly. A quick wipe removes surface dust before it migrates into vents: use a microfiber cloth across exterior panels, controllers, and nearby shelves.
When to use a vacuum or compressed air: perform deeper dust removal every 2–3 months in typical households, and monthly in dusty or pet-heavy homes. Never force compressed air directly into ports at close range: hold a can upright and use short bursts from 6–8 inches away. If a system’s fan noise increases noticeably, inspect vents immediately, louder fans are often the first sign that dust accumulation is causing higher operating temperatures.
A practical sensor: monitor ambient room temperature with a phone app or thermometer during play. If the room climbs above 26°C (79°F) and the console’s fans spin up quickly, increase ventilation, move the console, or pause sessions and clean vents.
Step-By-Step Safe Cleaning: Tools, Timing, And Techniques
Fact first: power down and unplug before any cleaning. That prevents short circuits and accidental button presses.
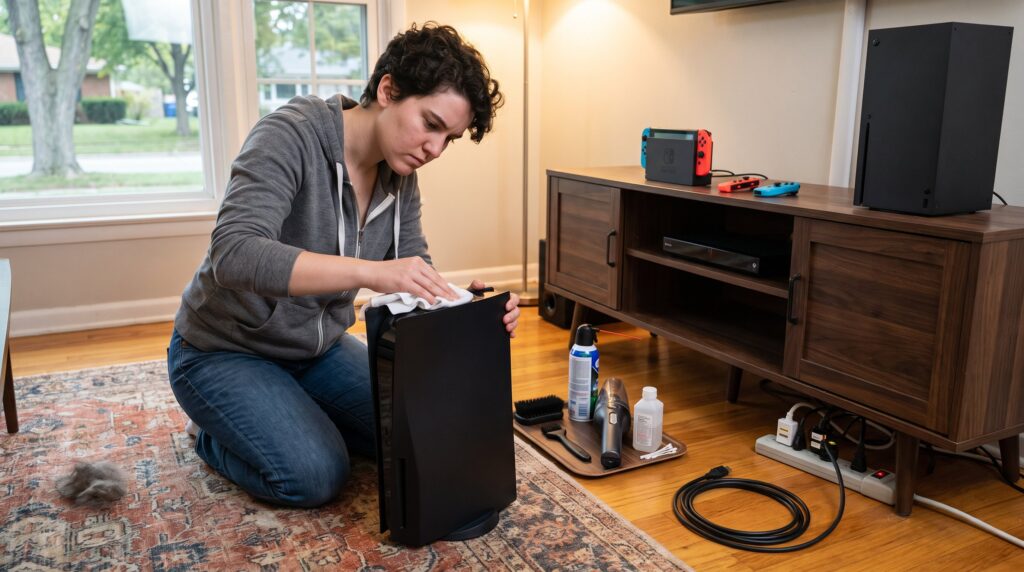
Tools to keep on hand: a soft microfiber cloth, a small anti-static brush, a handheld vacuum with low suction, cotton swabs, and 90% isopropyl alcohol for stubborn grime. Gamers who own handheld systems should follow vendor guidance: for example, Nintendo recommends lightly dampening a cloth’s corner with water for external wipes and ensuring the device dries fully before powering on.
Step-by-step:
- Turn off the console and unplug the power cable and network/HDMI leads. Wait two minutes for capacitors to discharge.
- Wipe the exterior with a dry microfiber cloth. For sticky spots, dampen the cloth slightly, never pour liquid directly onto the unit.
- Use an anti-static brush to sweep vent slats, then apply short bursts of canned air from 6–8 inches away. Avoid tilting the can to prevent propellant spray.
- Use a handheld vacuum on low power around vents to remove loosened dust. Do not insert vacuum attachments into ports.
- For small crevices, gently roll a cotton swab dampened with isopropyl alcohol, then let the console dry for at least 20 minutes before reconnecting.
Timing: a full cycle takes 15–25 minutes for consoles with moderate dust. If a player sees visible debris or hears constant fan stress during gameplay, accelerate to monthly deep-cleaning.
Cautionary example: a reader once used a high-power shop vacuum directly in vents and bent a fan blade. That unit required professional repair. Use low-suction tools and avoid inserting rigid objects into openings.
Cooling, Power, Software Care, And Basic Troubleshooting
Direct answer: manage airflow, protect power delivery, keep firmware current, and triage simple faults before calling support.
Cooling and placement: avoid enclosed furniture and heat sources (space heaters, direct sunlight). Elevate consoles on rubber feet or a small stand to improve bottom intake. If ambient temperature regularly exceeds 25–27°C, add room ventilation or a fan to reduce case temperatures.
Power protection: use a quality surge protector with a minimum joule rating of 600–1000 for living-room setups. Unexpected spikes and brownouts stress power supplies and cause component failures. For critical setups, a battery backup (UPS) with sine-wave output prevents abrupt shutdowns during power dips.
Software and updates: install official firmware updates promptly. Companies patch stability and thermal management improvements in updates. Players should also rebuild console databases (PlayStation) or clear cache partitions when performance drops: these steps often fix slow menus or unexpected freezes.
Basic troubleshooting checklist (do these in order):
- Reboot the console and router.
- Check HDMI cables and ports for dust or bent pins.
- Boot in safe/recovery mode to run file system checks.
- Test with one controller and disconnect accessories.
When to escalate: if hardware symptoms persist after cleaning and basic software steps, constant red LEDs, repeated crashes, or persistent disk errors, consult manufacturer support or a documented repair guide. For Xbox-specific repair pathways and detailed troubleshooting, the site provides a focused repair resource on Xbox fixes and diagnostics via its repair guide overview.
Verification of claims: authoritative guides emphasize cleaning vents and maintaining airflow as primary preventive measures: for a practical push to clean rigs at the start of the year, see a hands-on PC cleaning editorial that highlights benefits of routine maintenance and observable gains in noise and temperature control cleaning reminder.
Conclusion
Solid maintenance yields more playtime and fewer shocks: weekly exterior wipes, regular vent cleaning, good placement, firmware updates, and basic troubleshooting resolve most issues before they need paid repairs. When a problem outpaces home fixes, the site’s deeper Xbox and console repair resources help users choose safe service paths. Small, consistent actions add up, an extra hour each month spent caring for hardware can save hundreds in repairs and many hours of downtime.